Mon – Fri: 9AM – 5PM | Call Now (864) 518-9904
Serving places across Upstate SC: Five Forks, Simpsonville, Mauldin, Greer, Taylors and more.
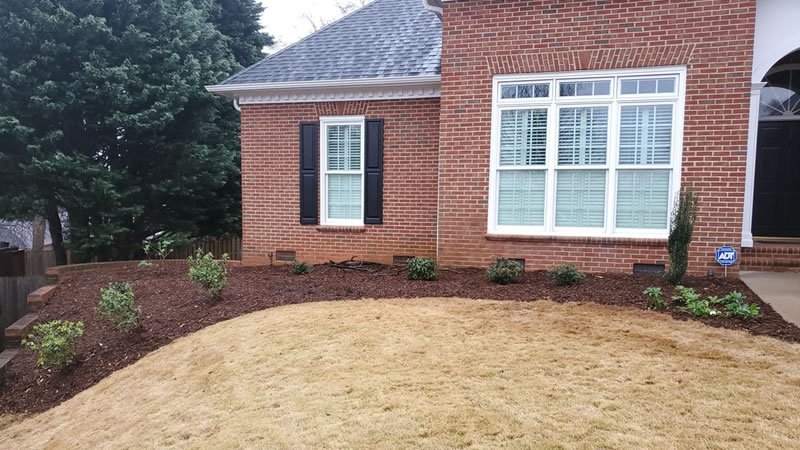
When you want a finished lawn now—not months from now—sod installation delivers instant cover and faster use. We start by reading grades, improving the top profile where needed, and matching sod type to sun and traffic. All across Upstate SC, we often upgrade builder soil and correct falls so water moves off the house; on slopes we set subtle terraces to keep seams tight and stable. Rolls are staggered, seams closed, and the surface rolled for root contact. You’ll get a simple, day-by-day watering plan and first-mow timing so the lawn takes quickly, stays healthy, and looks deliberate from day one.
Speed: Instant cover; use areas sooner with a finished surface.
Stability: Proper grading + rolling gives firm footing and limits washouts.
Fewer Weeds: Solid cover reduces germination in bare soil during establishment. (Avoid herbicides in the first year unless directed.)
Consult → Prep → Install → Water & Roll → First Mow
Measure, check sun hours, confirm lawn uses.
Fix finish grades; loosen the top soil profile where needed.
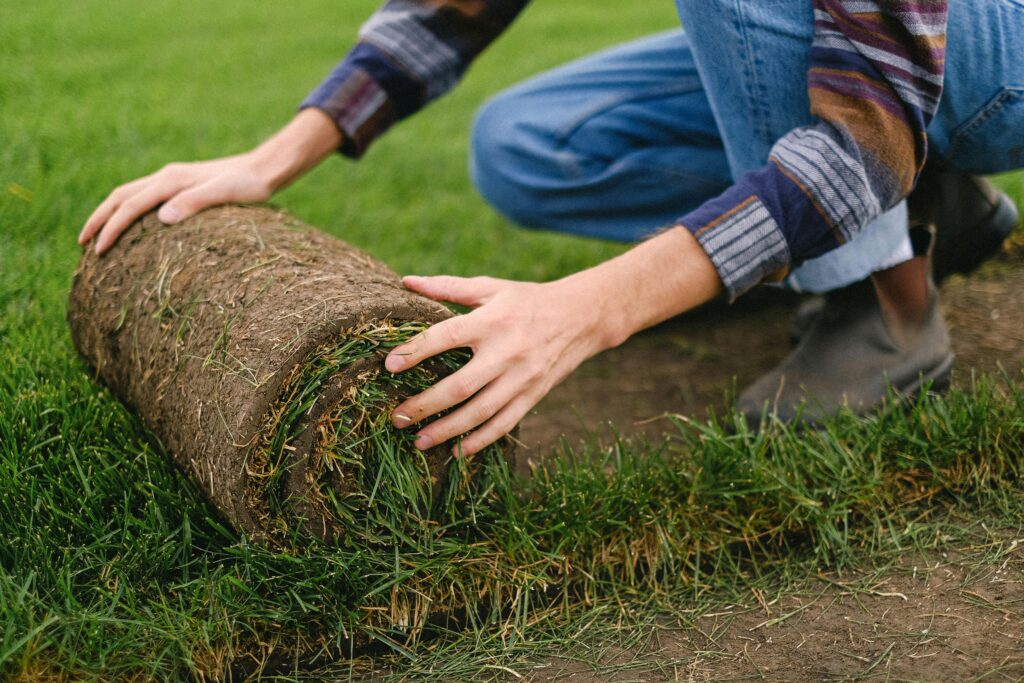
Stagger seams, trim edges, lay on moist soil, and roll firmly.
Follow the 10–14 day watering plan; re-roll high spots on day 2–3 if needed.
Mow only after sod is rooted; then resume normal cutting height.
We set positive fall away from structures and prepare the finish grade before any sod goes down, accounting for sod thickness at edges and firming the soil as needed so root contact is reliable. The best sod installation you can get; period.
Sod is laid with staggered joints (brick pattern), fitted tight without stretching, and rolled/tamped immediately to remove air gaps and speed rooting; on steeper slopes, pieces are oriented across the slope as recommended.
Immediately after laying, new sod is watered to wet the top ~4 inches of soil and then kept consistently moist during the first week (daily/as needed) to maintain that depth.
Mowing waits until the sod is firmly rooted (won’t lift), after which normal height resumes per species. After establishment, lawns typically require about 1 inch of water per week (rain + irrigation), applied less frequently and more deeply; early morning irrigation is the most efficient and disease-sparing window.
Hills, heat, and summer storms shape how we perform sod installation here. We set the finish grade first, correct low spots, and match turf to sun and traffic. Rolls go down on a prepared surface with staggered seams fitted tight; the surface is rolled for firm contact, and seams are oriented to hold on slopes. Irrigation begins immediately to keep the top layer evenly moist during early establishment, then tapers as roots knit. Mowing waits until the turf won’t lift. Edges are trimmed clean, transitions to beds and hardscapes are crisp, and you get a simple care plan to keep coverage uniform.
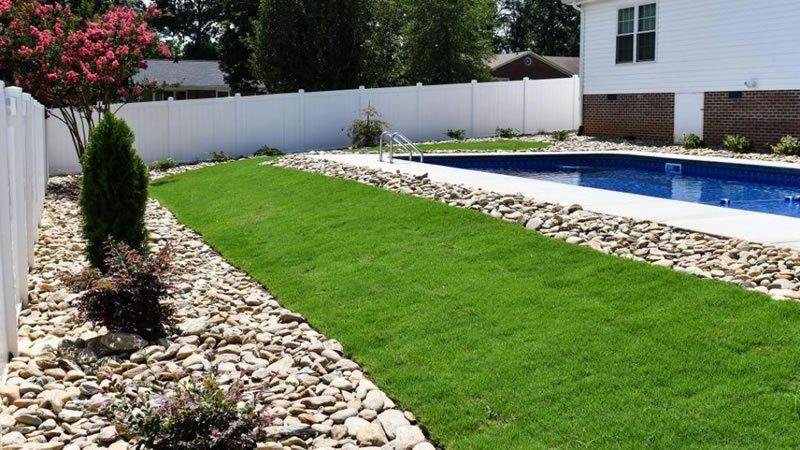
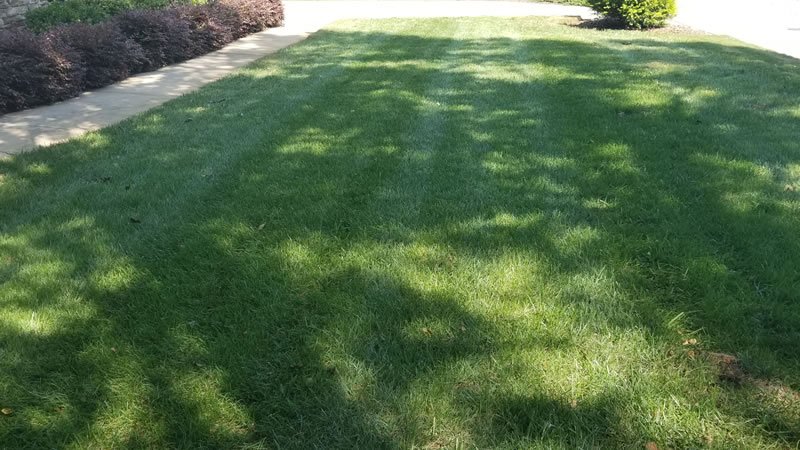
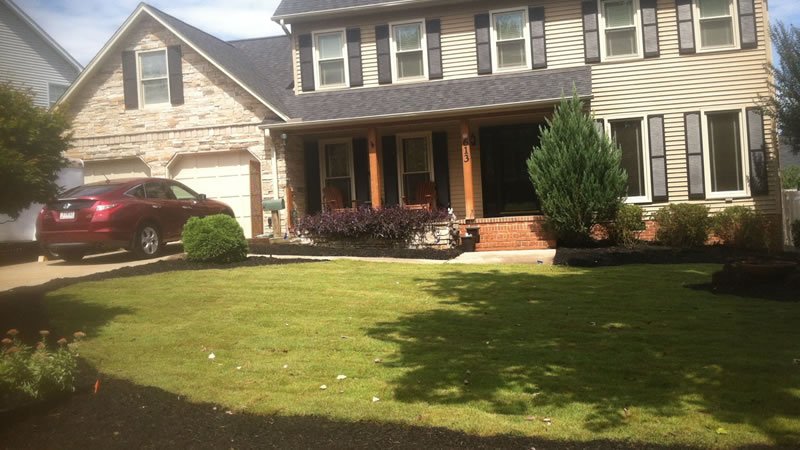
HOA-tidy frontage and level lawns call for a clean, finished surface. We set the finish grade first, correct low spots at entries and downspouts, then lay rolls with staggered seams fitted tight. The surface is rolled for firm contact, and seams are oriented to hold shape on gentle falls. Irrigation begins immediately to keep the top layer evenly moist during early establishment, tapering as roots knit. Mowing waits until the turf won’t lift. Edges along sidewalks and drives are trimmed clean so the front yard reads neat from day one.
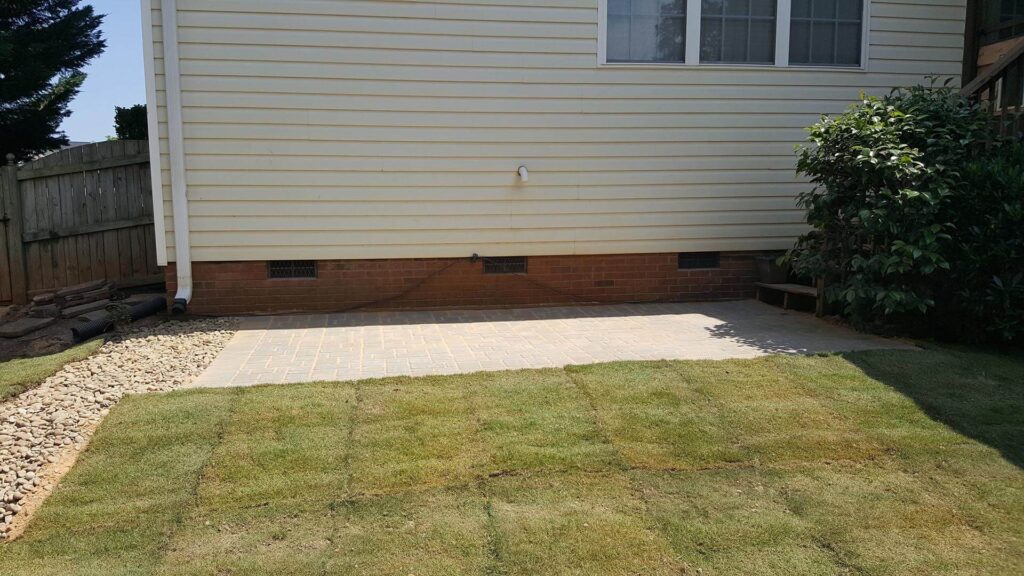
Newer subdivisions often need finish-grade corrections and sharper transitions around patios and walks. We prepare the surface, place rolls in a brick pattern with tight seams, and roll immediately for soil contact. Initial irrigation wets the top layer thoroughly and keeps it consistently moist through early establishment; frequency drops as rooting develops. First mow waits for a firm tug test. Borders are cut clean, and joints at hardscape lines are shaped so the lawn looks intentional rather than patched.
Older streets and driveway crowns can push water toward curb edges and corners, so a true finish grade comes first. Rolls go down on the prepared surface with staggered seams set tight; we roll to remove air gaps and lock the surface flat. Watering starts right away to keep the upper profile evenly moist during the first week, then shifts to deeper, less frequent cycles as roots take. Mowing is delayed until the turf won’t lift. Edges are trimmed to match curb lines, and transitions to beds are crisp for a tidy, established look.
Foothill slopes and mixed exposures demand extra attention to hold and stability. We set subtle falls away from patios and entries, lay rolls with seams across the slope, and roll for firm contact. On day two, any raised areas are re-rolled so the surface sits tight. Early watering keeps the top layer uniformly moist, tapering as roots knit into the base. Mowing waits until the turf is firmly anchored. Edges are cut to clean lines at steps and paths so the lawn presents smooth, continuous coverage even on short slopes.
Sod Installation. Finish-grade first, then place, seam, and roll for tight contact—followed by a clear watering window. The lawn locks the site together when the upstream work is in order: drainage solutions keep seams dry, landscape design dictates where turf vs. beds belong, plant & mulch installation frames edges, and hardscapes provide clean transitions.
EXCELLENTTrustindex verifies that the original source of the review is Google. Ed Solomon took care of an erosion problem I had in my side yard. It was easy to talk to him and he understood what needed to be done. He sent landscapers who worked in hot temperatures in June, and did an extraordinary job. I am extremely pleased with the outcome. I recommend Solomon's Landscape & Design company to anyone who could use expert help with their landscape.Trustindex verifies that the original source of the review is Google. Ed and his team did a great job with brining my yard back to life! I’m looking forward to more projects with them in the future!Trustindex verifies that the original source of the review is Google. The Solomons crew did a great job, worked hard and were responsive to requests. The office was responsive to my phone calls. I plan on calling them next year for more yard service. Highly recommend them.Trustindex verifies that the original source of the review is Google. Triming of shrubs and mulch installed. Two new mulch beds added. They were on time, did a good job and cleaned up. A satisfied customer. 😀Trustindex verifies that the original source of the review is Google. Very professional landscaping service. They even helped with some leftover tree stumps from Helene.Trustindex verifies that the original source of the review is Google. Solomon’s Landscape and Design did a beautiful job making our yard look beautiful!Trustindex verifies that the original source of the review is Google. Ed recently came to our house to give us a quote for some yard projects we were considering doing. He was friendly, flexible with our schedule, arrived on time, took note of our goals and any concerns we had, and provided us with several different options which was helpful. We ended up not moving forward with the projects right now, but based on this initial meeting, would consider working with Solomon's Landscape & Design in the future.Trustindex verifies that the original source of the review is Google. I met with Mr. Solomon this past week to discuss future plans. He was not pushy at all. He definitely knows his plants and grass. He had some great ideas. Some of those ideas will be long term goals and others will be starting soon.Trustindex verifies that the original source of the review is Google. Solomon’s landscaping has the experience to do the job right. They can design an entire new look for your house planting trees or bushes and show you what everything will look like in a photo before any decisions are made. The owner takes pride in doing the right thing, I wouldn’t trust anyone else with my projects!
Cheap sod installation fails: seams split, sod browns, puddles form. We match grass to your micro-climate, power-grade and amend the soil, and set tight, well-watered seams so it roots fast, stays thick, and boosts curb appeal immediately.
Stop babysitting bare spots—call (864) 518-9904 or Book Your Sod/Seed Consultation now.
Sod installation involves laying pre-grown grass onto prepared soil to establish a new lawn quickly. Whereas from seed, it takes more time to grow, it is less uniform, and there are more weeds that occur when seeding. Sod also provides an instant green space.
Proper soil preparation ensures good root development, improves water and nutrient absorption, and helps the sod establish quickly and thrive.
Preparation involves removing existing vegetation, tilling the soil, adding organic matter or soil amendments, leveling the area, and ensuring proper drainage.
There are a variety of factors, based upon size of area to cover, as well as type of sod. Typically sod installation with soil preparation can range from $12,000 to $2,500. Which also includes our exclusive Plant Protection Program with a one (1) year nutrition program, and one (1) year replacement warranty.
Common amendments include compost, peat moss, carbon products and starter fertilizer. These materials improve soil structure, drainage, and nutrient content, creating an ideal environment for the sod to root.
Conduct a soil test to determine pH levels, nutrient content, and soil composition. This information helps identify any deficiencies and the necessary amendments.
Depends on the type of grass. If you want warm season grass, such as Bermuda or Zoysia then the spring into the summer is best, as it grows during this time of year. Keep in mind that too close to fall could mean that the grass may not be able to root that year. While installing Bermuda grass while dormant is standard practice and just fine, you will not be able to find Zoysia, as suppliers do not cut during dormancy. For cool season, such as fescue, the best time is the fall, as it’s growing season is the fall and winter time when temperatures are cooler.
Newly installed sod should be watered thoroughly immediately after installation and then kept consistently moist for the first few weeks to promote root establishment. Gradually reduce watering as the sod roots and becomes established.
Sod typically takes about 2-3 weeks to start establishing roots in the soil. Full establishment, where the sod is fully integrated and growing vigorously, can take 6-8 weeks.
Yes, sod can be installed on slopes, but extra care is needed to ensure proper soil preparation, secure installation with sod staples, and adequate watering to prevent erosion and ensure the sod stays in place.